How to take a course on LinkedIn Learning with a Github Repo
Some of our courses on LinkedIn Learning allow you use Github repositories in order to follow along and practice with the course, so let's take a look at how that works and how you might use Github to enhance the way you take the course.
Find the link to the repository
The first step is to find out if a course has a repository. Let's take a look at one of my courses, CSS: Scrolling and Parallax
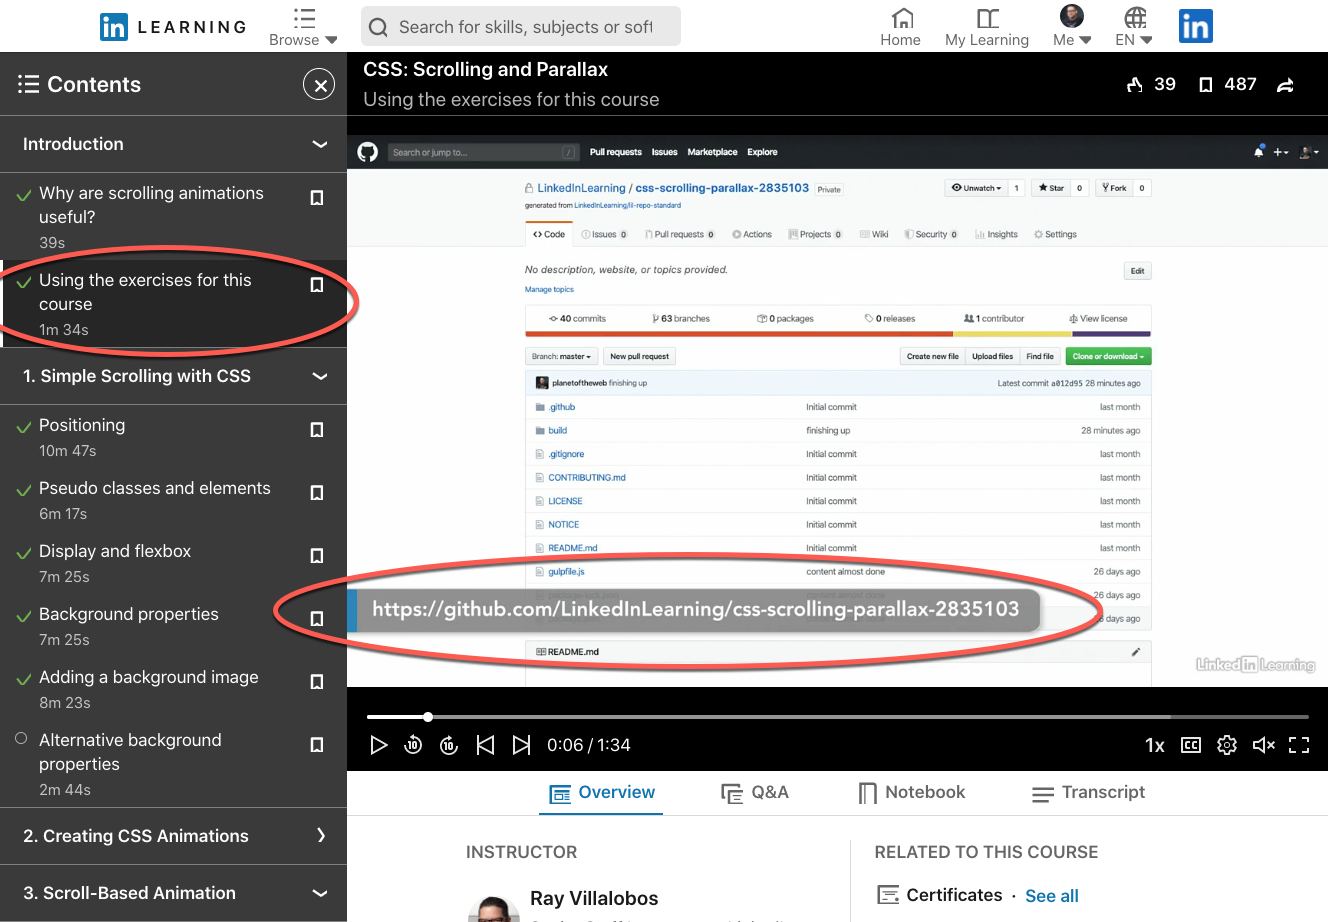
Course with a Github Repository will have a special video that tells you how to use the exercise files for the course. Towards the beginning of the course, you should see a link to the github repository.
Looking at the repository
If you go to that link, you'll see the repository for the course. The master branch usually has the finished version of the project prepared for the course. The README.md file will also have a description as well as instructions on how to install what this course needs.
Downloading the course files
Let's say you wanted to follow along with this course. You can use the Code button on Github to download the repository for the course.

If you're used to working with the terminal, you can copy the link to the repo, or if you have Github Desktop, Open the project in Codespaces or you can choose Open with Github Desktop. Let's do that.
Using Github Desktop
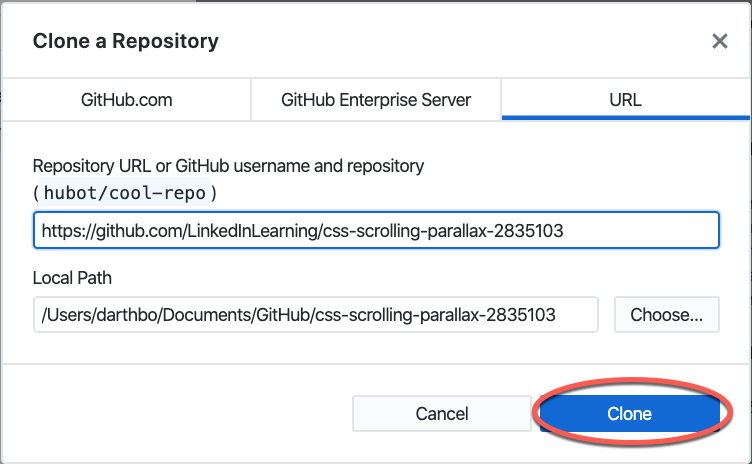
From here, you can clone the repository to your local hard drive. You have the option of changing the default location if you want to. Let's just hit the clone button.
In this window you have the option of opening the repo in your external editor, show the files in the finder or open the repo in your browser. Let's open this up in Visual Studio Code.
Installing Dependencies
This is a node.js based project, which requires you to install dependencies. Let's open up the terminal and install the dependencies.
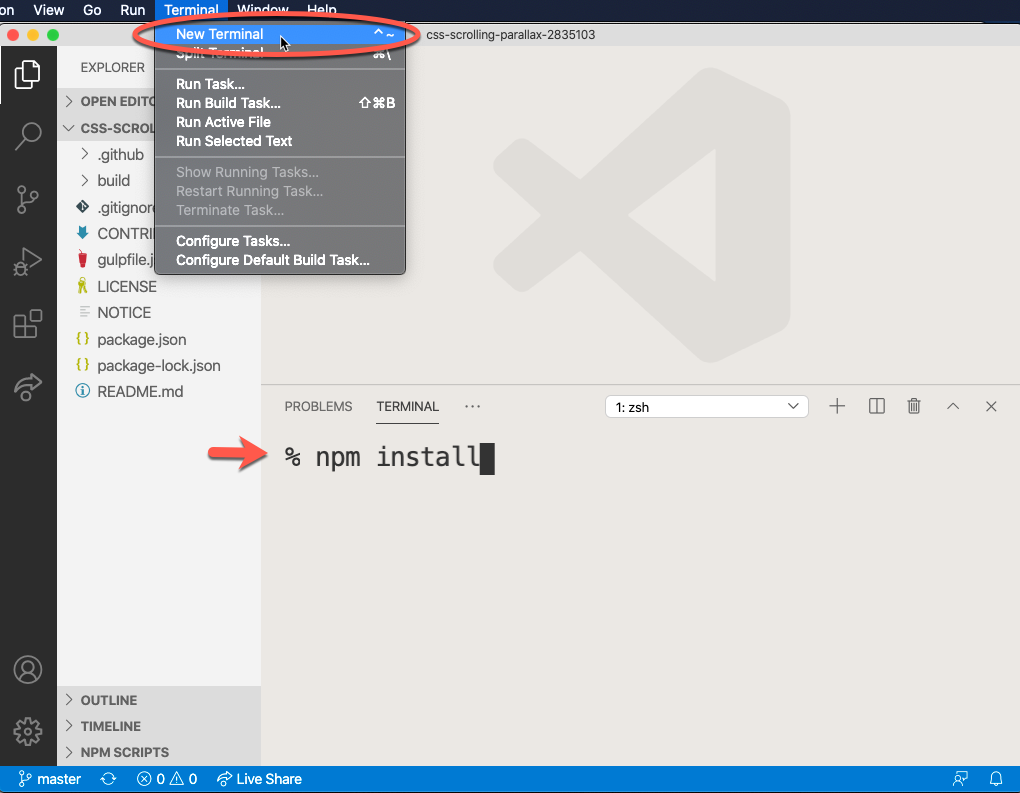
You can open up a terminal using the terminal menu or the keyboard shortcuts and then issue an npm install command. Once it's done, you can close out the terminal.
Running Start Script
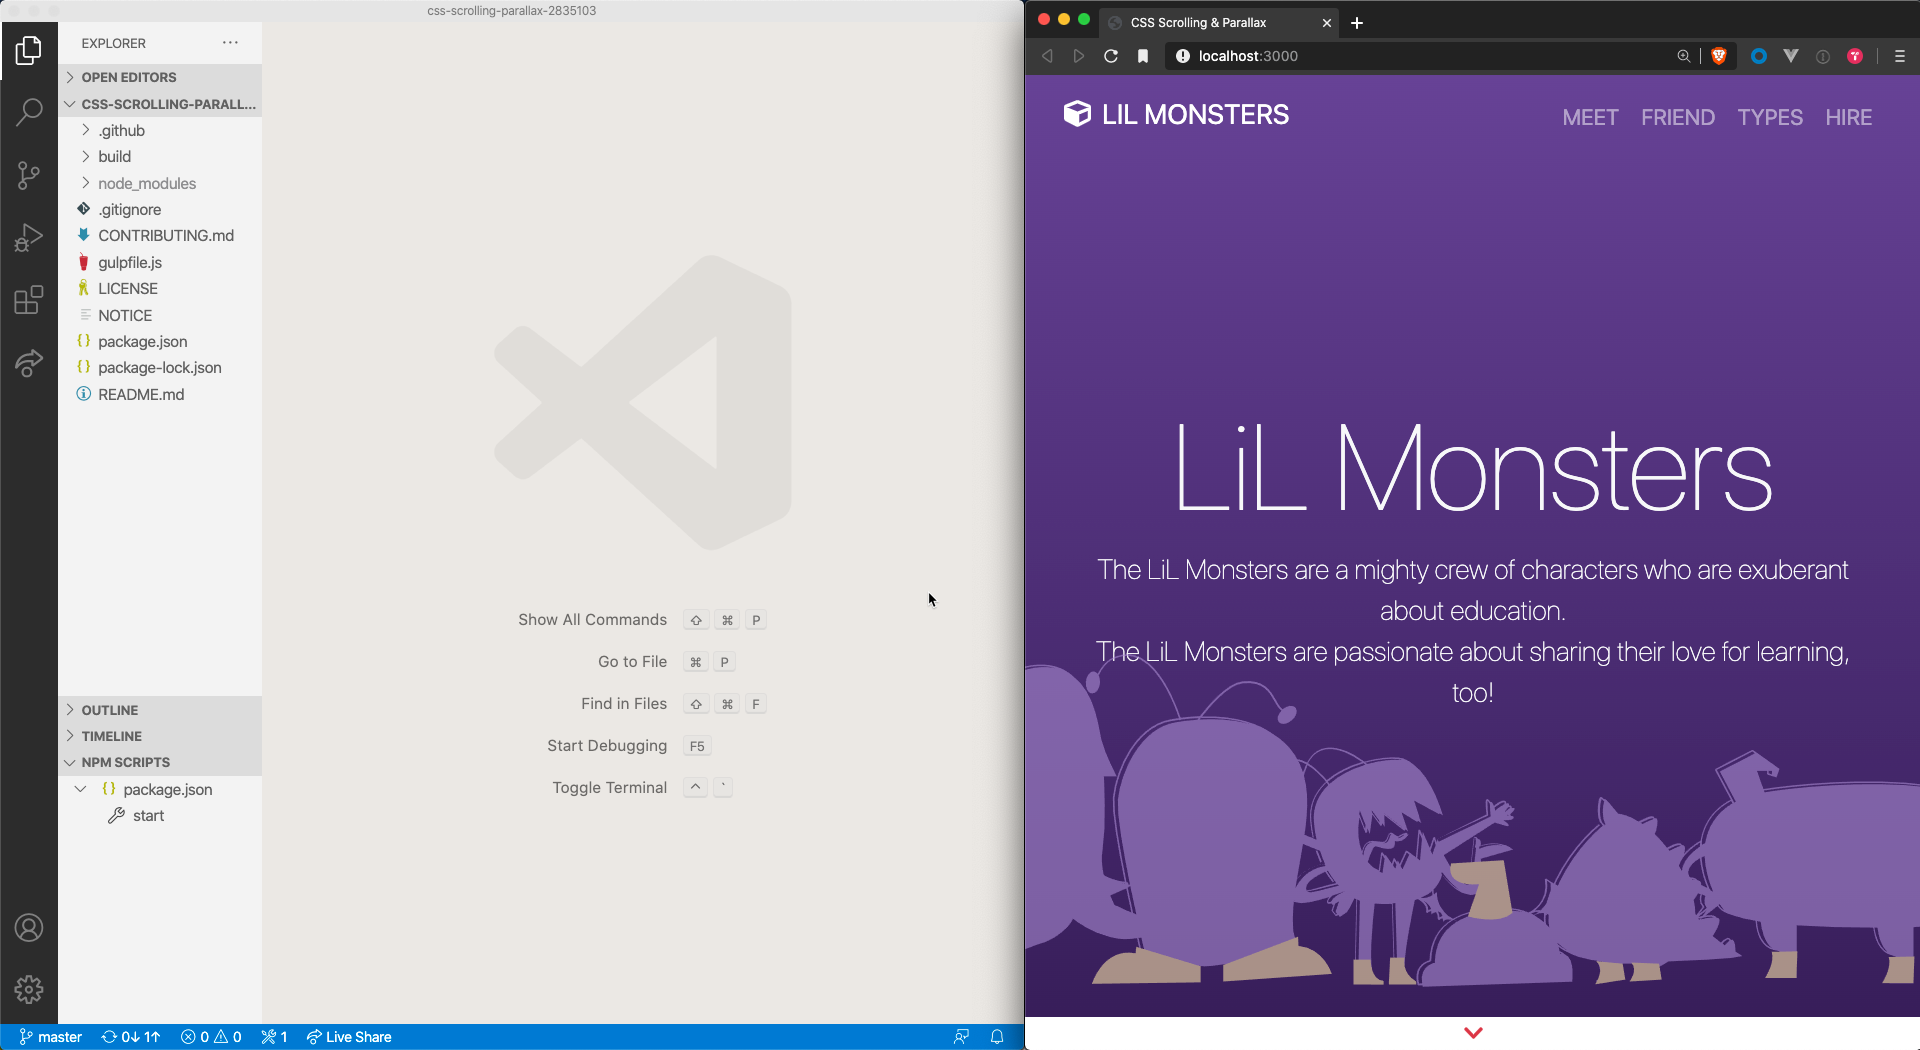
As a convenience, this repository has a live reload server. Let's go ahead and start that so we can see what the project looks like. If you're familiar with the terminal, you can issue an npm start command, but you can also get to it from your activity bar.
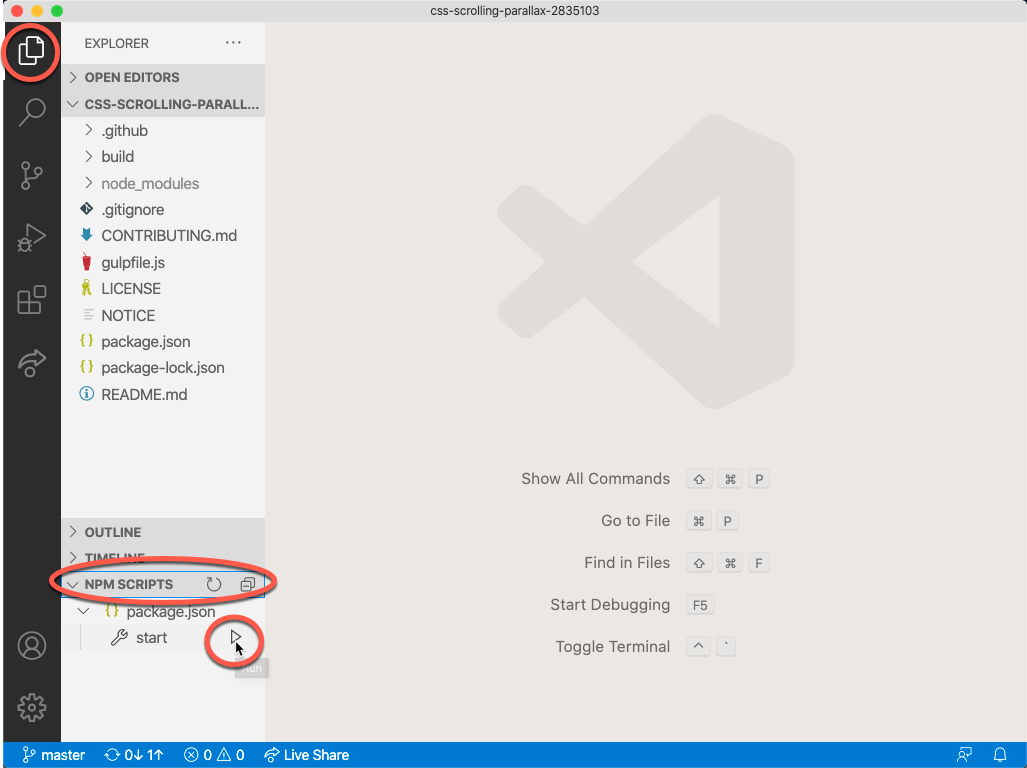
Under NPM SCRIPTS, you'll see the start script. Click on that, and VSCode will issue the npm start command for you. You should see a browser window come up with the finished version of the site.
Navigating through the course
The course is organized so that there are branches for every video that changes the code. The branches are named for the Chapter and the Video number in the Table of Contents. You might also see a reference to the proper branch in the video for each course.
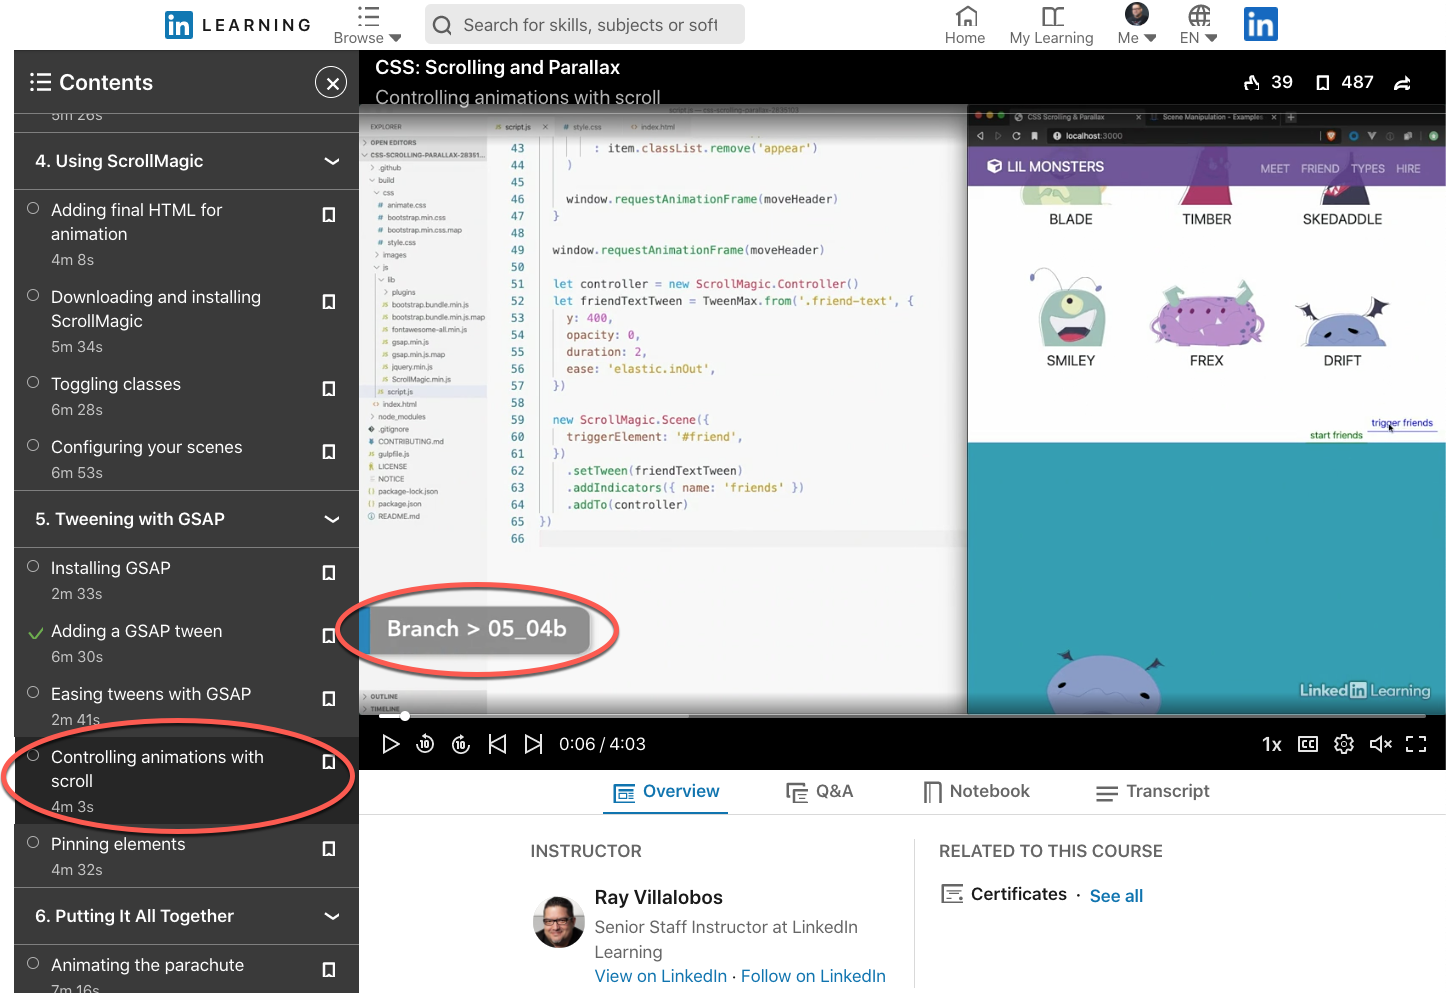
So, if you're watching a video in the fifth chapter and want to get the code for the fourth video, you would use a branch called 05_04. If the branch has a b at the end, that's how the code looks at the beginning of the video, if it has an e at the end, it's how the code looks at the end.
Let's switch to branch 05_04b. In this video, I show you how to adjust the animation of the text so that it reacts to the scrolling of your mouse. It's not a lot of code.
Comparing Branches
This is where things get interesting and you have the potential of using the full power of Git or Github to enhance the way you work with the course. Let me show you some of what I can do.
Let's say that I wanted to know what code I need to type into the project in this video. Github makes that easy with a hidden compare feature. If I go back to the repo, I can add the text /compare/FROMBRANCH...TOBRANCH and take a look at the difference between two branches. Take a look at this comparison
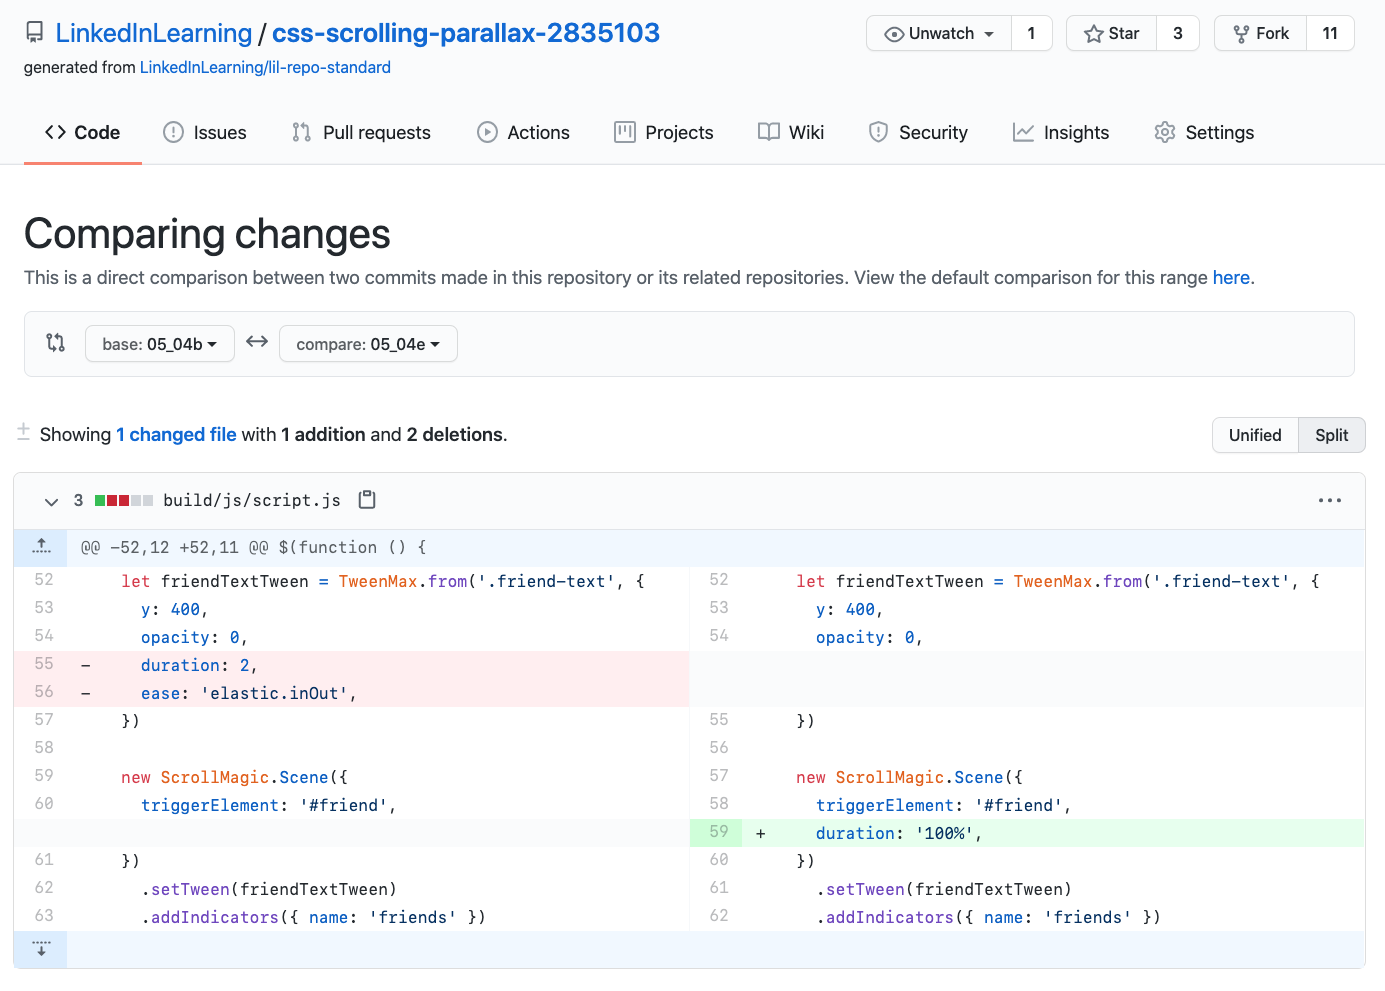
Notice that this highlights exactly the line numbers I need to change from the beginning to the end of the video, and although the changes are to only one file in this video, it would also show me any other files that changed. I can copy and paste from this view as well. That's pretty handy.
Visual Studio Code help
There's some ways that Visual Studio code can help as well. Let's make the changes from the comparison.
- duration: 2,
- ease: 'elastic.inOut',
...
+ duration: '100%',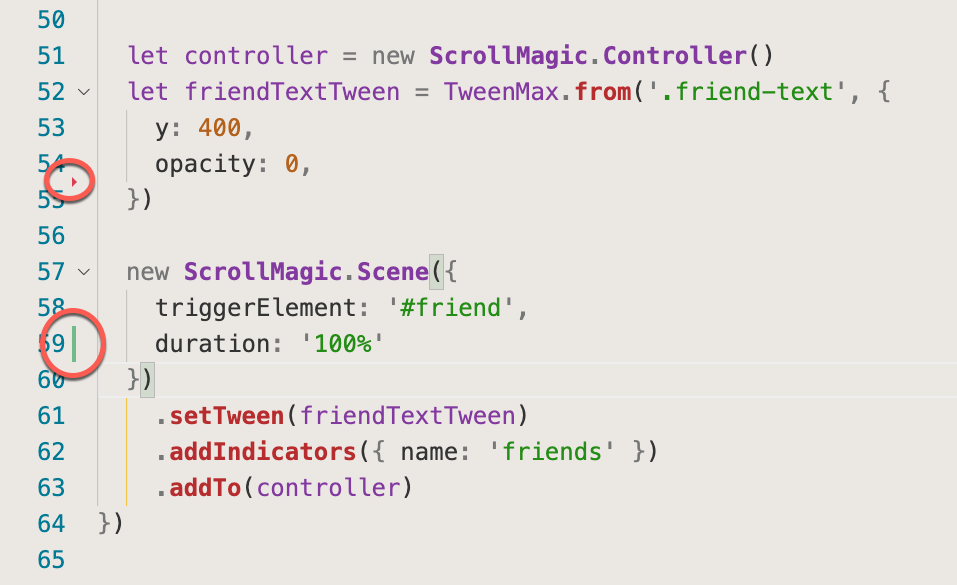
Visual Studio code is giving us some hints here about what I've done. You can see a little triangle where I deleted lines and a little bar where I've added lines. You can click on those to see what the changes have been. Let's click on the triangle.
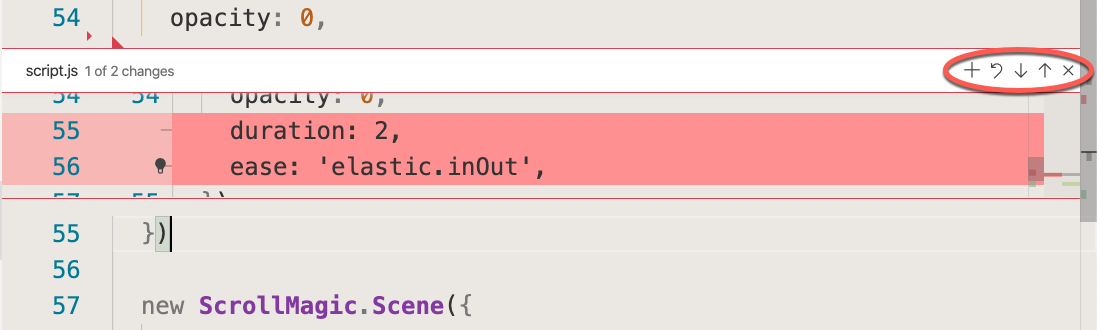
Notice the triangles to the top right of this view.
- The
plus signwill stage the change - The
rotated arrowwill revert the change...in our case, that would put the finished code back on the page; - The
upanddownarrows will move up and down the code - The
xwill close the window.
Let's just close the window for now.
Debugging with Git
Now let's say I make a simple mistake to this project. One of those hard to debug mistakes that are common when trying to follow along. Instead of typing in a colon for the duration property, I'll add an = sign. I just did that the other day and it took me quite a while to find the problem.
- Save this document.
- Open up the terminal
- Issue a
git diff 05_04ecommand
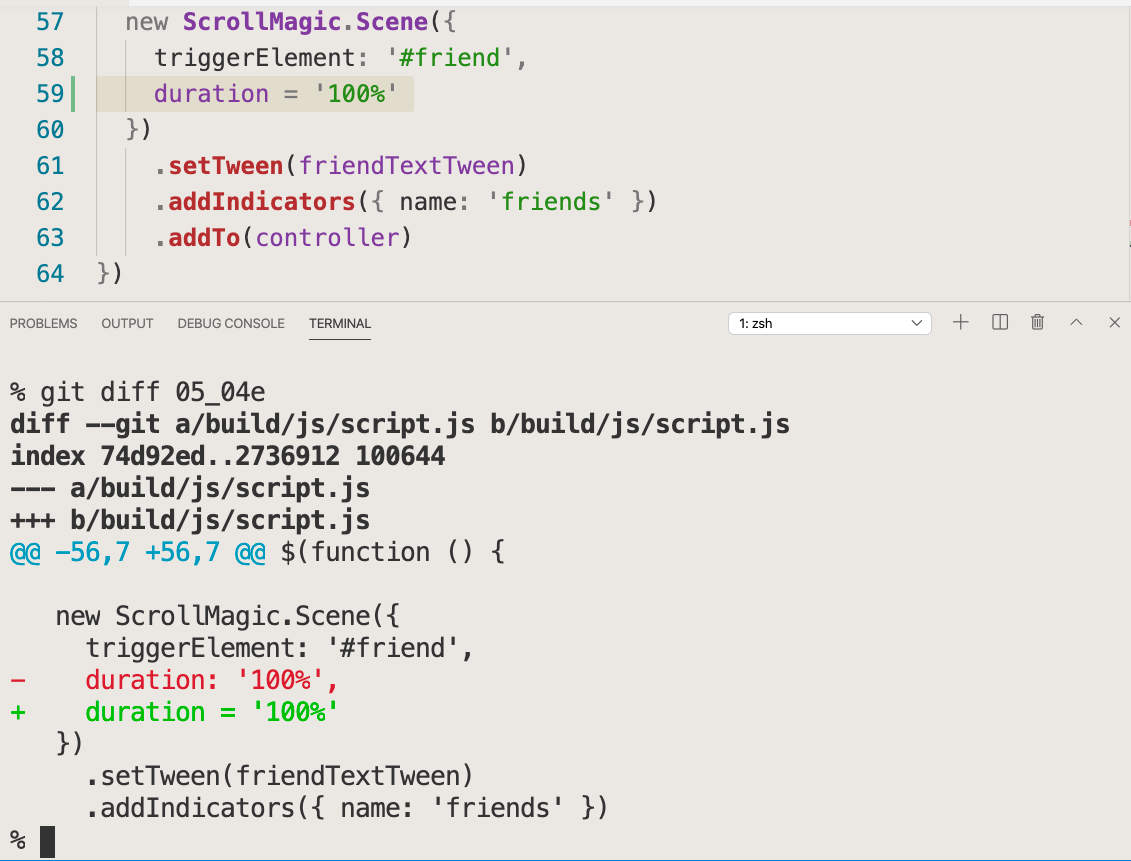
This can show you the difference between the current file and how the code looks at the end of the video, so it's highlighting where the code differs.
Conclusion
There's a lot more that you can do and working this way gives you the full power of Git, Github and Visual Studio Code to make taking courses with repositories a superior experience.